The Complete Guide to Industrial Property Listing Photos That Convert
In industrial real estate, quality photos can make the difference between a vacant property for months and receiving multiple inquiries in the first week. While residential and retail properties have long emphasized professional photography, industrial property owners often underestimate the power of compelling visuals.
This guide walks you through creating industrial property listing photos that attract quality tenants and maximize your property’s appeal—whether you’re shooting yourself or hiring a professional.
Key Takeaways
- Professional photos generate 32% more views and 40% higher inquiry rates
- You don’t need expensive equipment—a late-model smartphone with proper technique works well
- Shoot from waist height (4 feet), not eye level, to make spaces appear larger
- Essential shots: exterior approach, loading docks open, wide interior corners, clear height demonstration
- One case study showed 900% ROI on a $750 professional photography investment
Why Quality Industrial Property Photos Matter
The Numbers Don’t Lie
Industrial property listings with professional photography typically experience:
- 32% more online views
- 40% higher inquiry rates
- 26% faster leasing times
- 12% better lease terms
Most importantly, quality photos attract more qualified prospects—tenants who understand the value of your property before they even schedule a tour.
Essential Equipment for Quality Industrial Photography
Camera Options
You don’t need expensive equipment to get excellent results:
Professional route:
- DSLR or mirrorless camera with a wide-angle lens (16-35mm range)
- Tripod for stability and consistent heights
- Remote trigger to avoid camera shake
Budget-friendly options:
- Late-model smartphone with wide-angle capability
- Clip-on wide-angle lens attachment ($15-30)
- Smartphone tripod mount ($10-20)
Lighting Equipment
Industrial spaces often have challenging lighting conditions:
- Portable LED light panels for dark corners
- Flash with a diffuser for filling shadows
- Smartphone users: Invest in a small LED light panel ($30-50)
Pre-Shoot Preparation Checklist
Before taking a single photo, ensure the property is properly prepared. This step often makes more difference than your equipment.
Exterior Preparation
- Remove all debris from parking areas and approaches
- Clear weeds from around the building perimeter
- Ensure all exterior lights are functional
- Remove temporary signage and banners
- Park vehicles away from the main façade
- Schedule photography for clear weather days
Interior Preparation
- Clear all debris and sweep floors
- Remove any abandoned equipment or furniture
- Replace any burned-out light bulbs
- Clean windows that will appear in shots
- Remove garbage cans, cleaning equipment, etc.
- Open bay doors if they showcase the space effectively
Documentation to Have Ready
- Building measurements and specifications
- Property highlights and unique features
- List of recent improvements or upgrades
The Essential Shot List for Industrial Properties
For specs on what features matter most to tenants, see our guide to loading docks, ceiling heights, and power requirements.
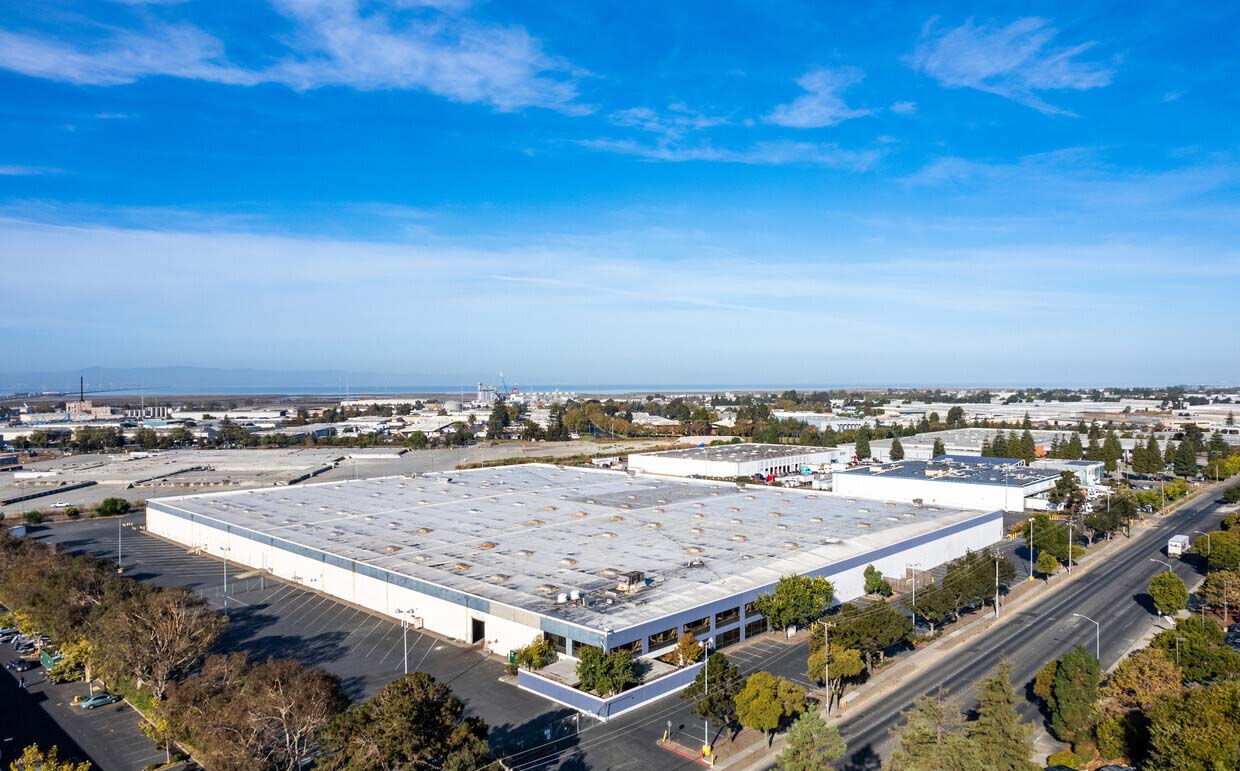
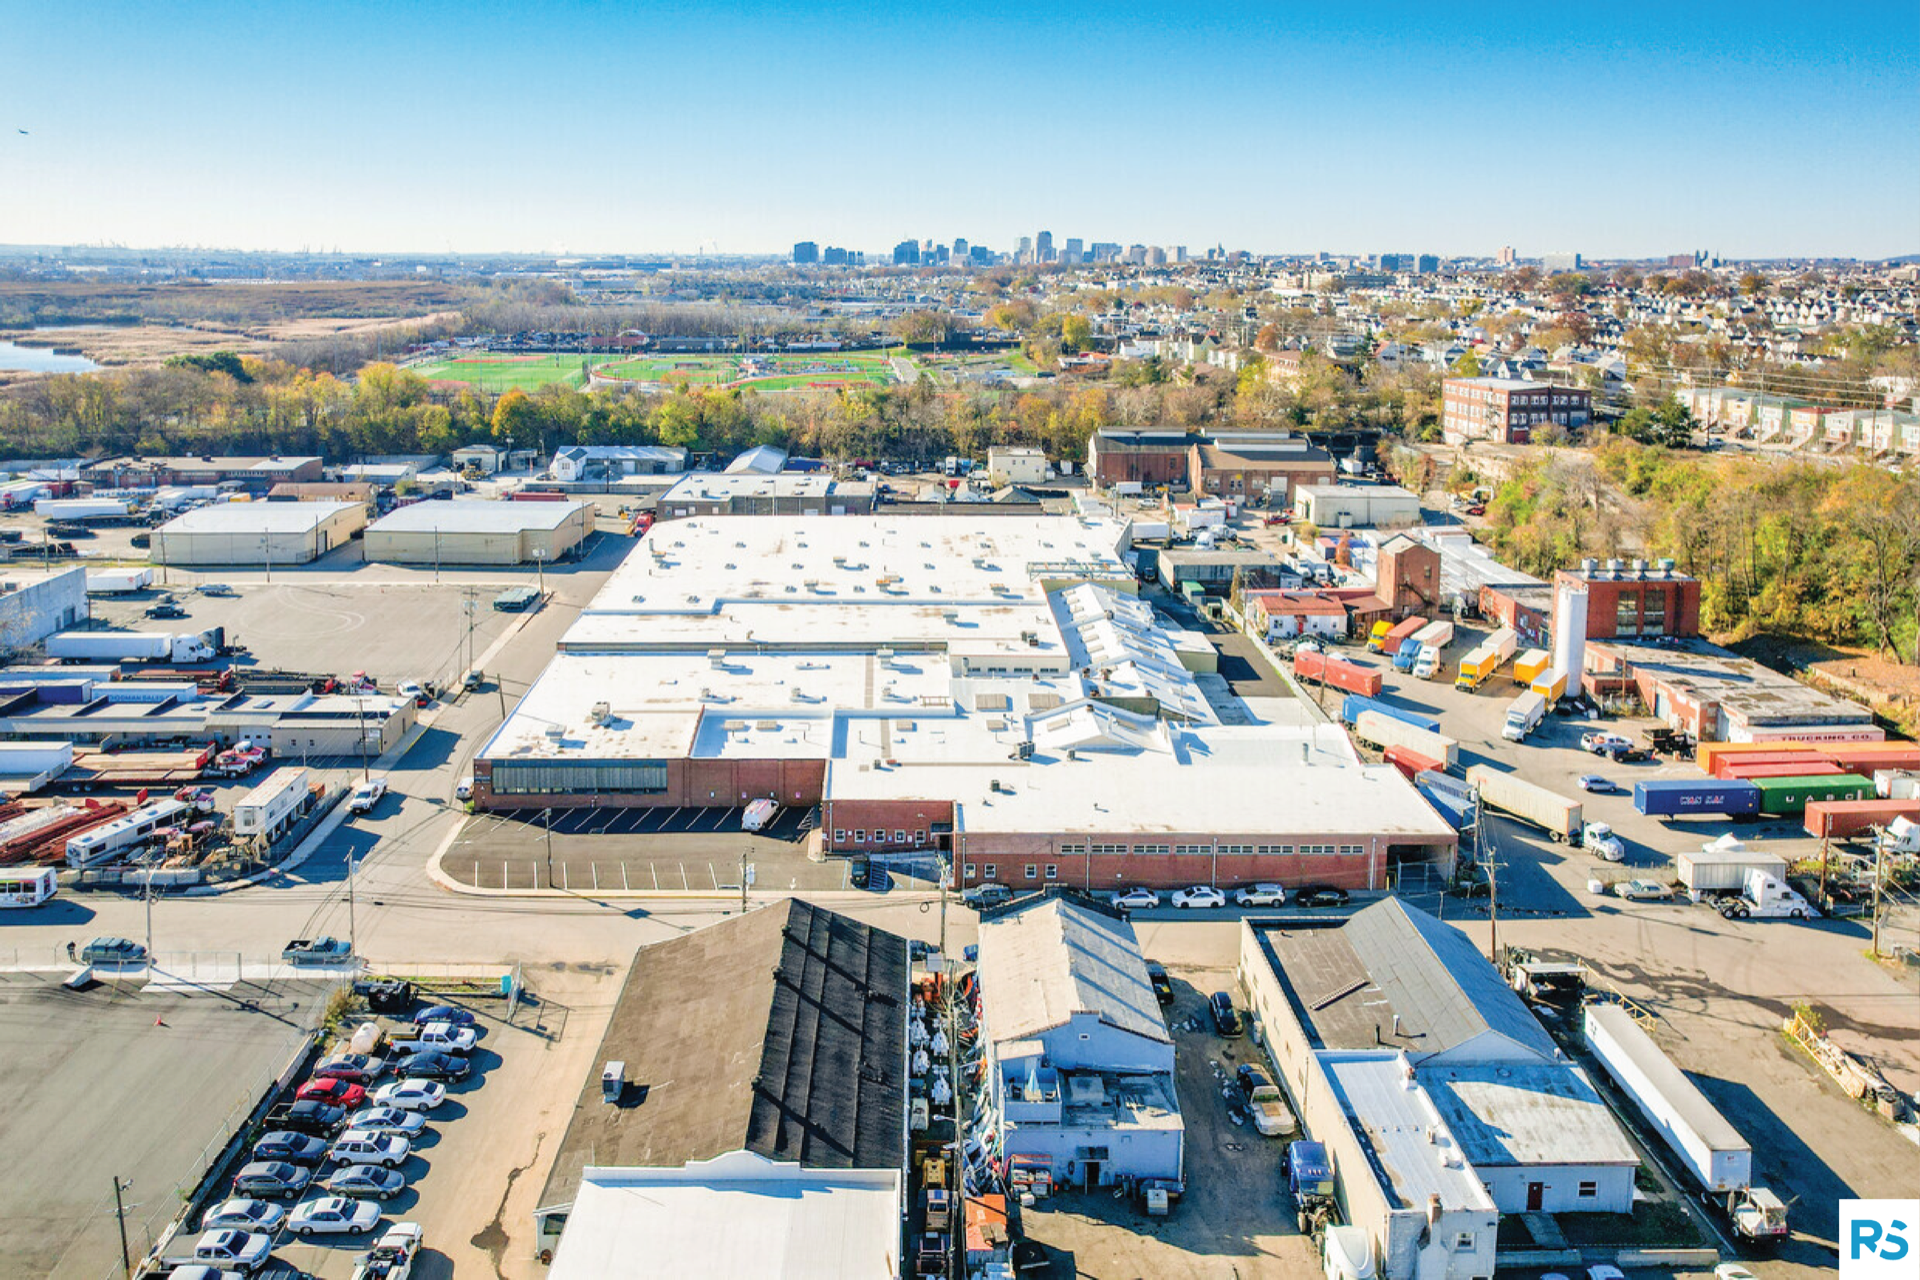
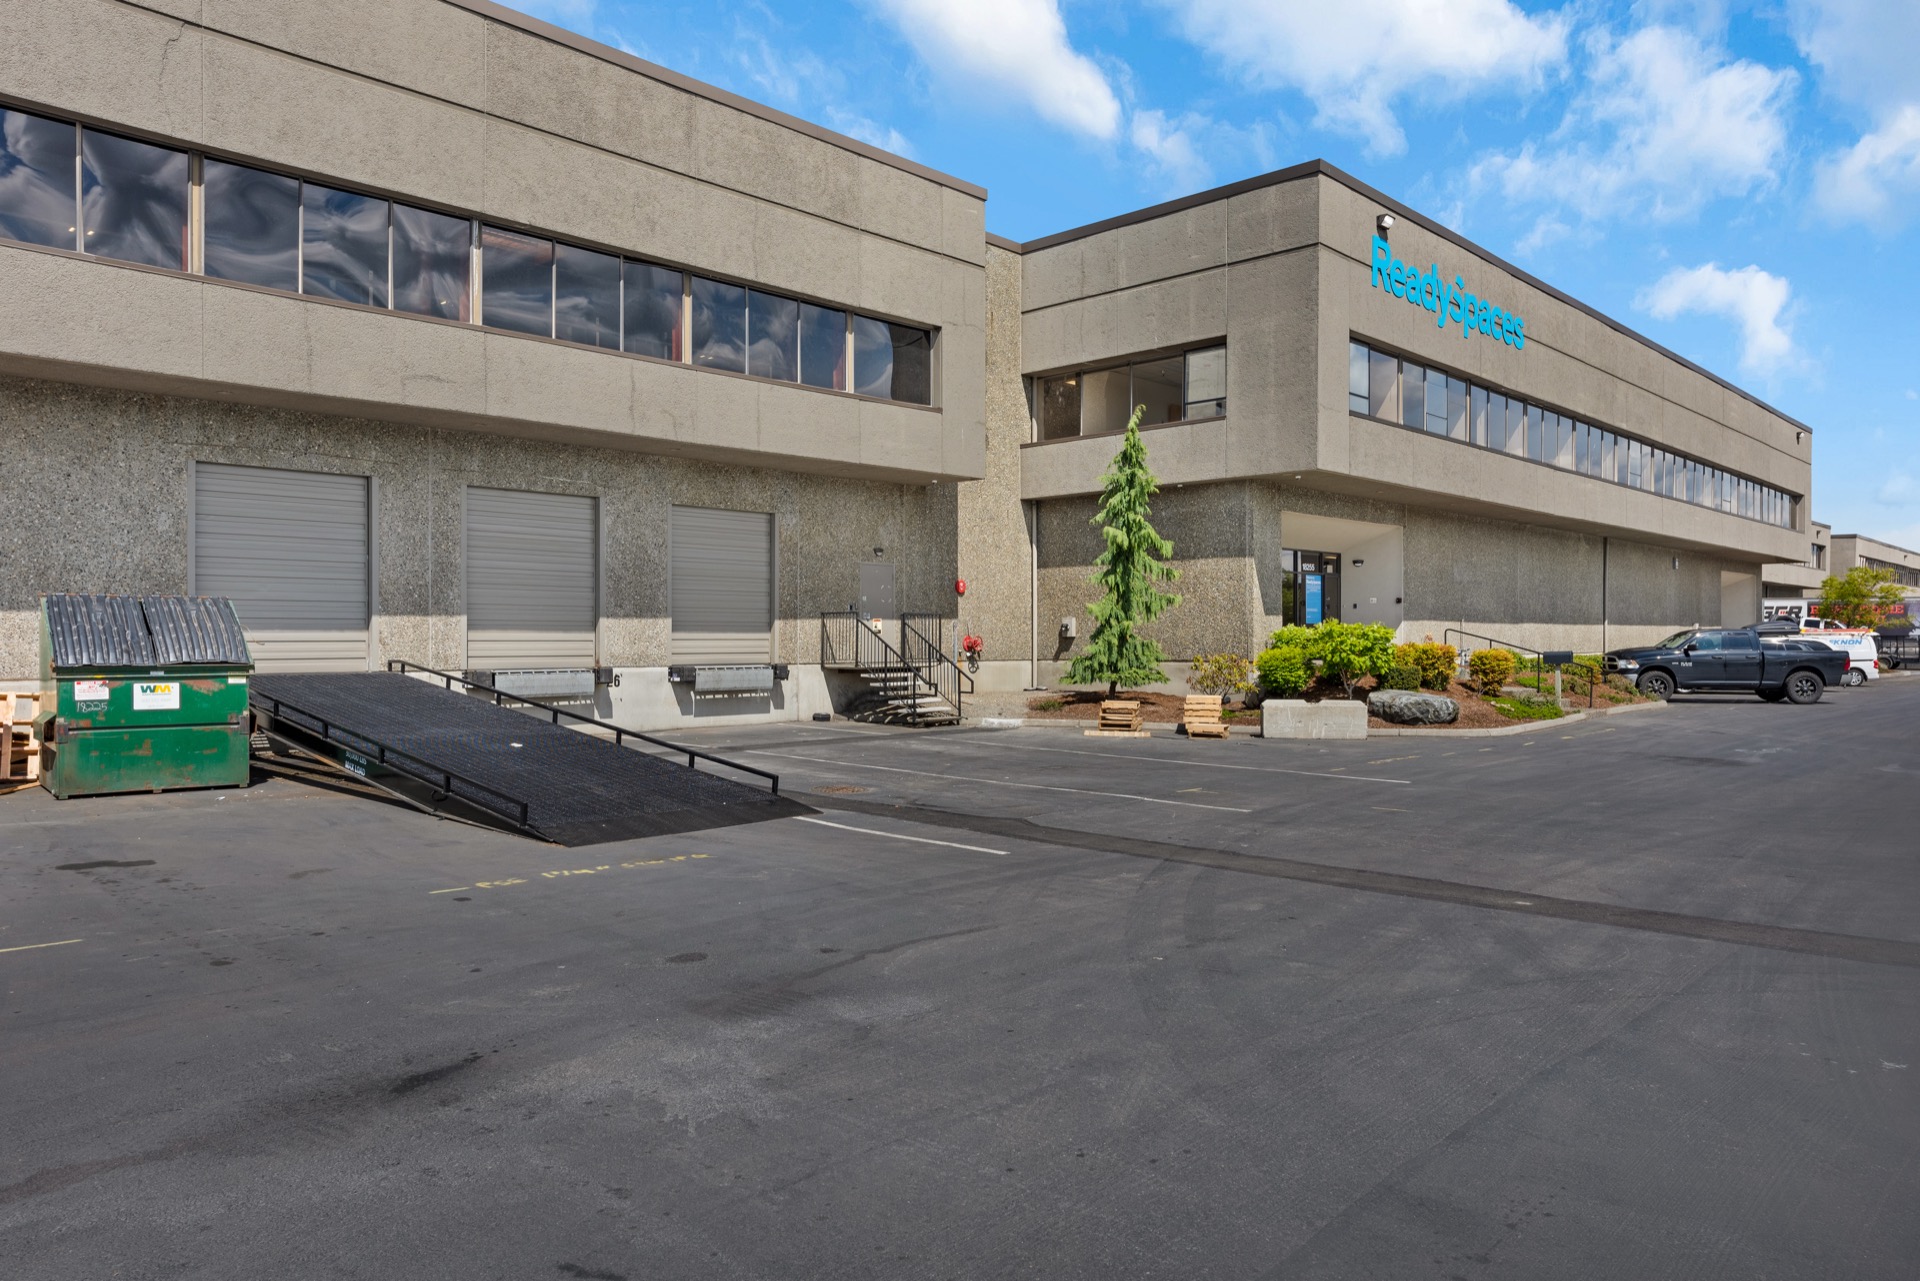
1. Exterior Approach Shots
- Main entrance approach showing access
- Building façade with signage area
- Context shot showing the property in its surroundings
- Aerial view if possible (drone photography)
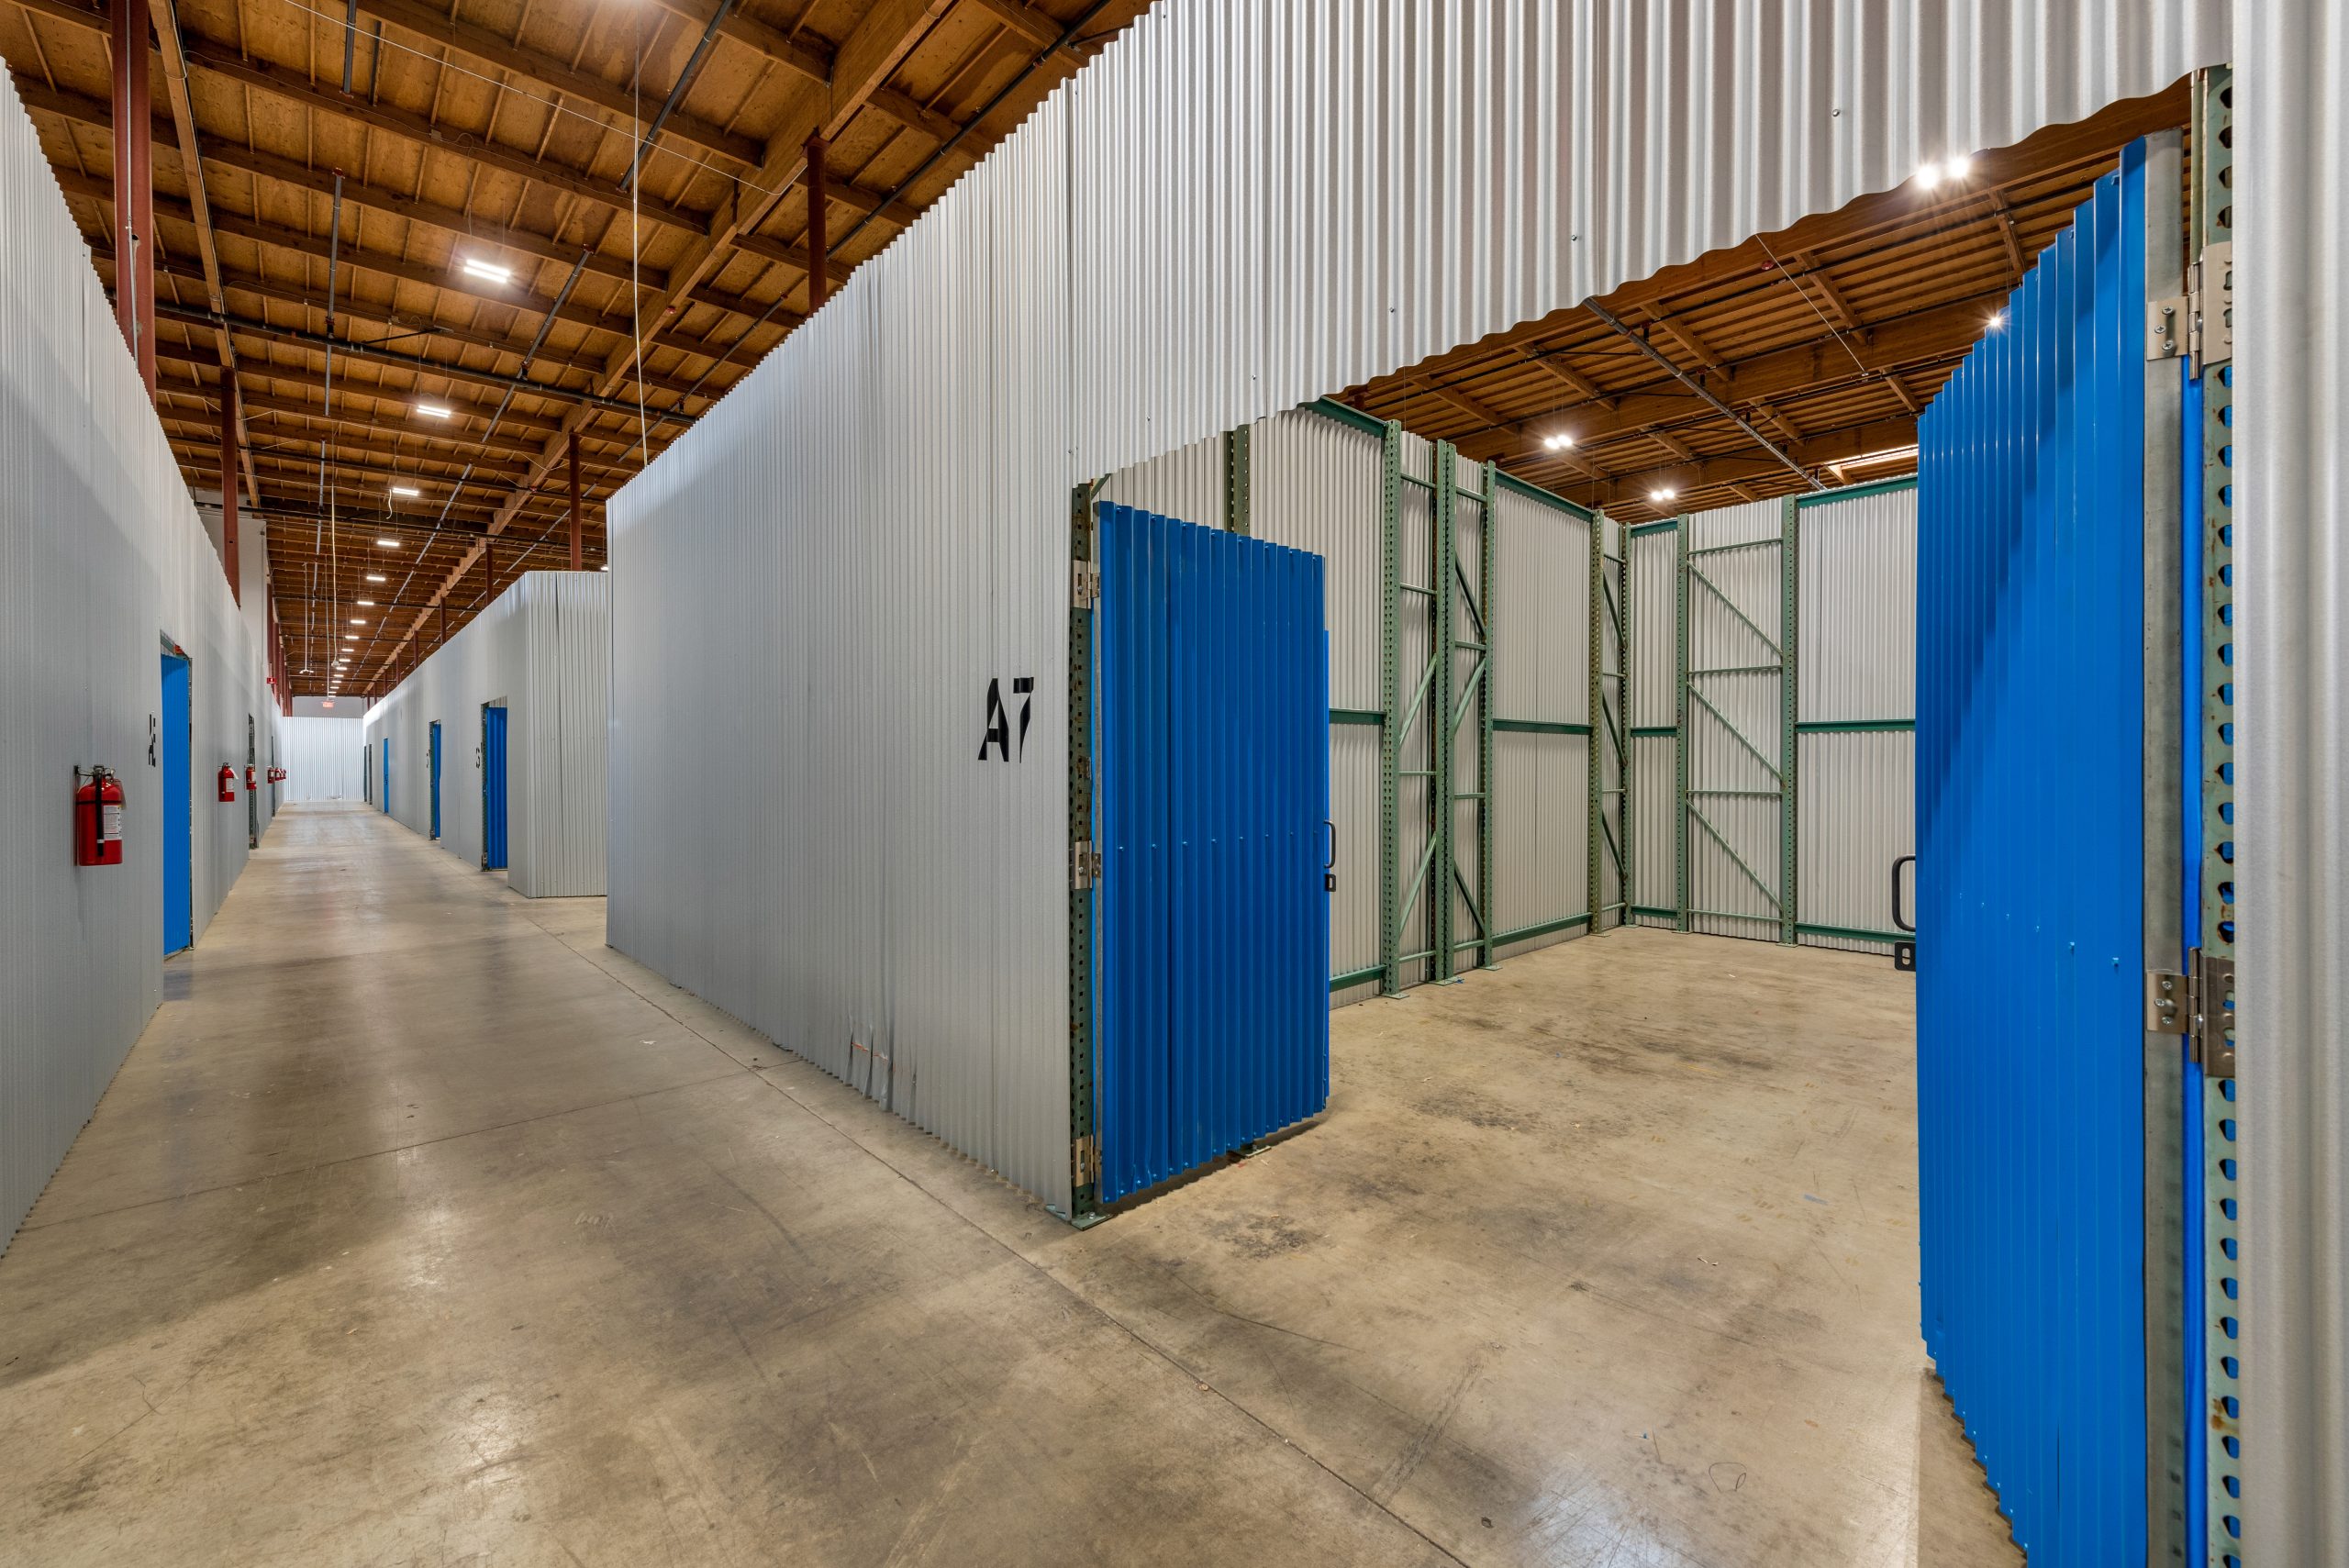
2. Loading and Access Areas
- Full view of the truck court and maneuvering areas
- Loading docks with doors open
- Drive-in doors at ground level
- Trailer parking areas
- Rail access points (if applicable)
Pro Tip
Always photograph loading docks with doors OPEN. Closed dock doors hide one of your property’s most important features. If possible, show a truck at the dock to demonstrate functionality and give prospects a sense of scale.
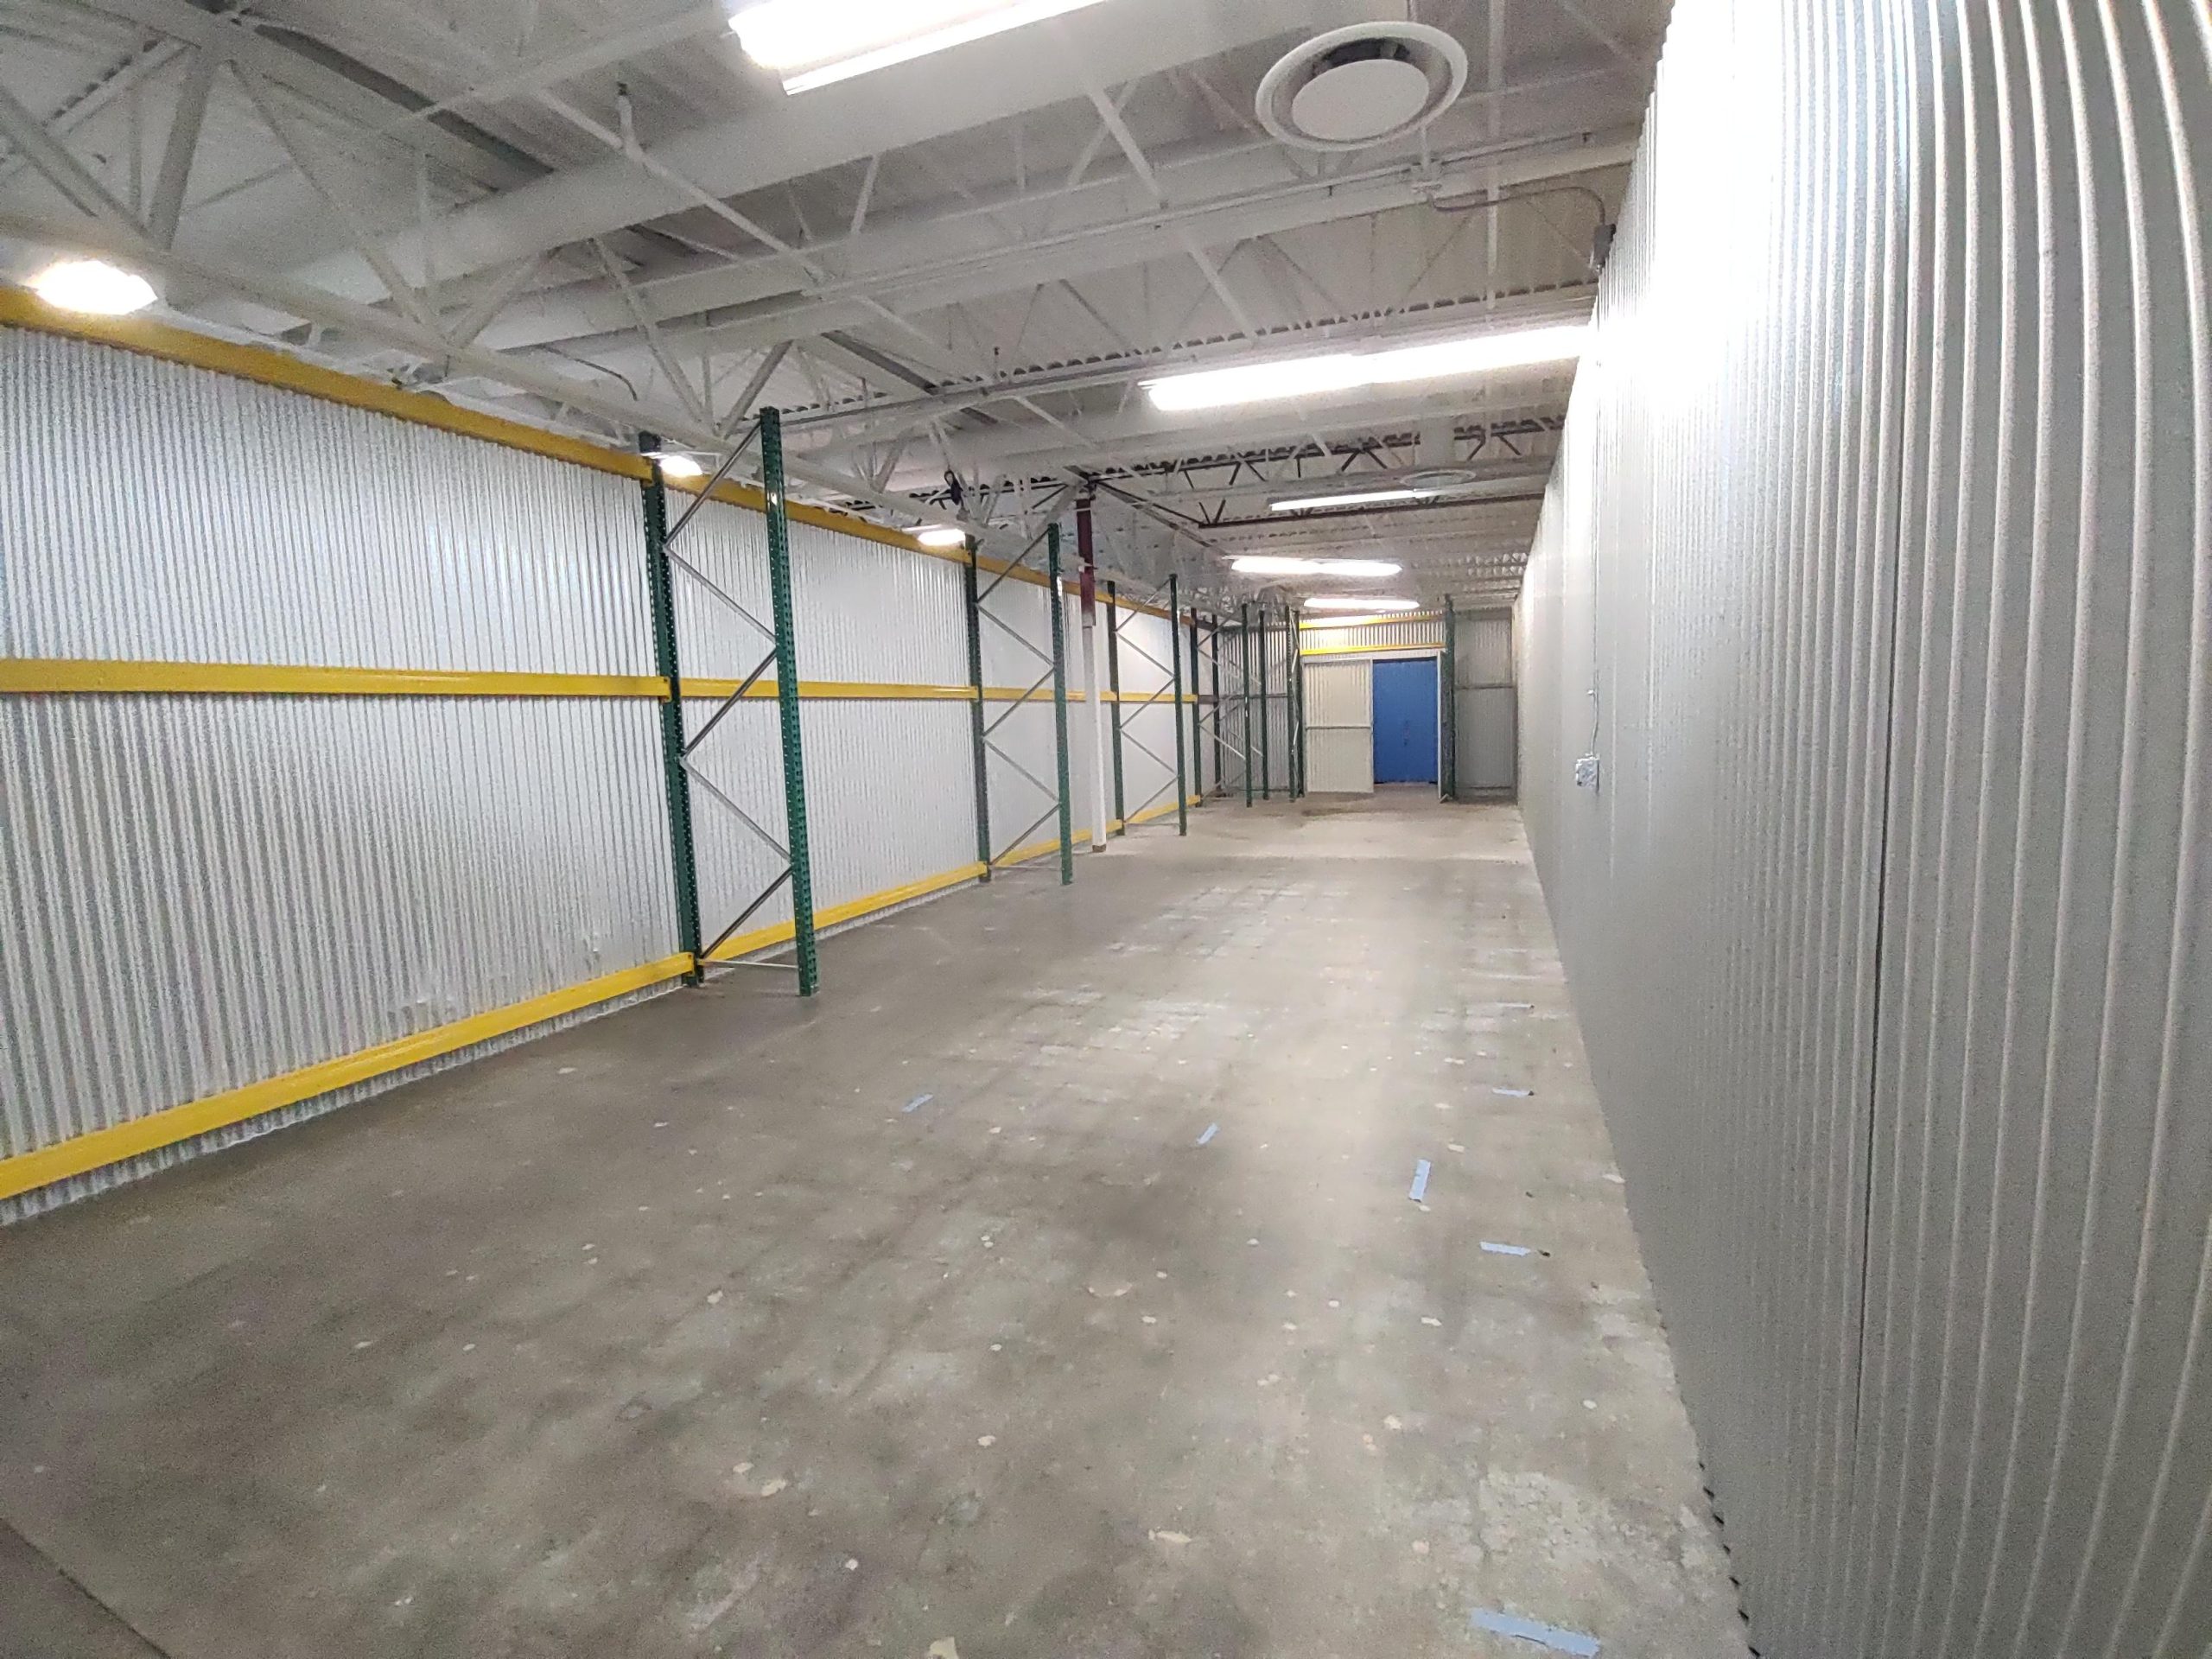
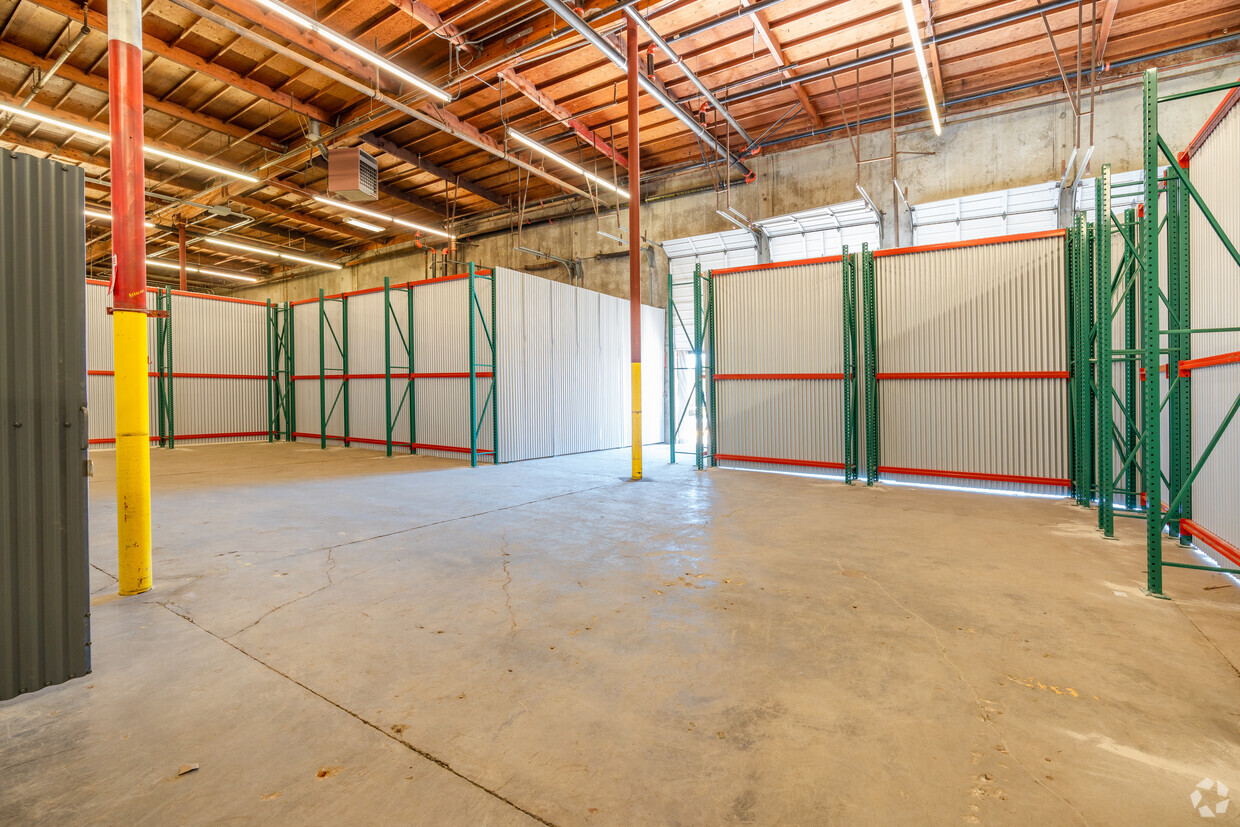
3. Interior Warehouse Space
- Wide shots from multiple corners showing full depth
- Photos that demonstrate clear height
- Column spacing demonstrations
- Floor condition close-ups if in excellent shape
- Power and utility access points
4. Office Areas
- Reception or entrance areas
- Representative office spaces
- Conference rooms or collaborative areas
- Break rooms or employee amenities
- Restroom facilities (if recently updated)
5. Special Features
- Heavy power electrical systems
- Specialized HVAC or refrigeration
- Crane systems or lifting infrastructure
- Security features
- Unique building elements
Photography Techniques for Industrial Spaces
Lighting Strategies
Industrial properties present unique lighting challenges:
- Mixed lighting solution: Take multiple exposures and blend them in editing
- Time of day matters: Schedule exterior shots when the sun illuminates the main façade
- Turn on all lights: Always photograph with all interior lights on
- Supplemental lighting: Use portable lights to illuminate dark corners
- HDR techniques: Use HDR (High Dynamic Range) for spaces with windows and dark interiors
Composition Tips
Frame your shots to maximize appeal:
- The rule of thirds: Position key elements at the intersection points of an imaginary grid dividing the frame into thirds
- Leading lines: Use floor markings, columns, or building lines to draw the eye through the space
- Height perspective: Take photos from waist height, not eye level (approximately 4 feet high)
- Wide, not distorted: Use wide-angle lenses but avoid extreme distortion
- Include people for scale: In very large spaces, include a person to demonstrate size
Pro Tip
To demonstrate clear height effectively, include vertical elements that give scale—a person, forklift, or stacked pallets. A bare ceiling photo doesn’t convey height nearly as well as one showing a 30-foot ceiling with a forklift for reference.
Highlighting Key Features
Make sure prospects can see what matters:
- Clear height demonstration: Include vertical elements that showcase ceiling height
- Column spacing: Frame shots down aisles to show column placement
- Floor load: If the property has reinforced floors, include close-ups of this feature
- Docks in action: If possible, show a truck at the dock to demonstrate functionality
- Before/after: For renovated properties, consider showing dramatic before/after comparisons
Editing for Maximum Impact
Basic Editing Checklist
Even excellent photos need some post-processing:
- Straighten verticals: Correct any leaning walls or columns
- Brightness/contrast: Adjust for optimal visibility of details
- Color correction: Ensure colors appear natural and consistent
- Remove distractions: Edit out temporary elements like cords or clutter
- Crop thoughtfully: Frame the image to focus on key elements
Affordable Editing Options
You don’t need expensive software:
- Adobe Lightroom ($9.99/month)
- Snapseed (free for smartphones)
- Pixlr (free online editor)
- Affinity Photo (one-time purchase option)
Organizing and Presenting Your Photos
Sequence Matters
The order of your photos creates a narrative:
- Start with the best exterior shot that shows the building clearly
- Follow with access and loading features
- Show main warehouse or production space
- Present office and amenity areas
- Highlight special features and unique selling points
Technical Specifications
For optimal online performance:
- Resolution: 2000-3000 pixels on the long edge
- File format: JPEG for online listings
- File size: Optimize to under 1MB per image without losing quality
- Naming convention: Use property address and feature in filename (e.g., “123Main-Warehouse.jpg”)
Common Industrial Property Photo Mistakes to Avoid
Technical Mistakes
- Extreme wide-angle distortion: Makes spaces look unrealistically large
- Poor lighting: Dark corners and shadows hide features
- Cluttered spaces: Debris and abandoned items suggest neglect
- Low resolution: Small, pixelated images that lack detail
- Inconsistent exposure: Some photos bright, others dark
Strategic Mistakes
- Too few photos: Not providing enough visuals of key areas
- Misleading angles: Photos that hide defects or misrepresent the space
- Generic shots: Photos that could be any industrial building
- Irrelevant details: Too many photos of minor features
- Outdated images: Using old photos that don’t reflect current condition
DIY vs. Professional Photography
When to DIY
- Budget constraints: When professional photography isn’t financially feasible
- Simple properties: Standard warehouses without complex features
- Short-term listings: For properties you expect to lease quickly regardless
- Photography skills: If you have experience and proper equipment
When to Hire a Professional
- High-value properties: When leasing rates justify the investment
- Unique or competitive properties: When you need to stand out
- Challenging spaces: Buildings with difficult lighting or layout
- Full service needed: When you need photos, video, drone, and virtual tours
Finding the Right Photographer
Look for photographers with:
- Specific industrial and commercial real estate experience
- A portfolio showing similar properties
- Equipment for elevated/aerial shots
- Ability to provide quick turnaround
- Understanding of industrial property features
Leveraging Photos Across Marketing Channels
Beyond the Listing
Maximize the value of your photography investment:
- Email marketing: Send photo-rich emails to broker networks
- Social media: Create posts highlighting different property features
- Property websites: Develop dedicated pages with comprehensive galleries
- Print materials: Create brochures and flyers for physical distribution
- Before/after campaigns: Showcase property improvements
Virtual Tour Integration
Combine photos with technology for immersive experiences:
- 360° photography: Create interactive panoramic views
- Video walkthroughs: Complement still images with motion
- Drone footage: Provide aerial context and approach views
- Measurement integration: Add dimensions to photos for perspective
Case Study: The Power of Quality Photography
Vacant Warehouse Transformation
A 75,000 SF warehouse had been vacant for eight months with minimal interest despite a competitive lease rate. The property had only six basic photos in the listing.
The solution:
- Professional photography session (investment: $750)
- 35 new high-quality images
- Drone aerial footage
- Virtual tour integration
The results:
- 215% increase in online listing views within the first week
- 12 showing requests in the first month (compared to 5 in the previous eight months)
- Leased within 45 days at a 7% higher rate than previously advertised
- Estimated ROI: 900%+ on the photography investment
Final Checklist: Your Industrial Property Photo Plan
Planning Phase
- Schedule photography for optimal weather and lighting
- Prepare property thoroughly (interior and exterior)
- Create a shot list based on property features
- Gather property specifications for reference
Execution Phase
- Capture all essential angles and features
- Use proper equipment and techniques
- Take multiple options of key areas
- Document special features and selling points
Post-Production Phase
- Edit for optimal presentation
- Organize in logical sequence
- Optimize for online platforms
- Integrate with property descriptions
Deployment Phase
- Upload to listing platforms
- Share across marketing channels
- Update as property changes
- Collect feedback on which images generate the most interest
For more on attracting the right tenants, see our guide to attracting quality long-term tenants.
Frequently Asked Questions
How many photos should an industrial property listing have?
A quality industrial listing should have 20-35 photos covering exterior approach, loading areas (with doors open), interior warehouse shots from multiple angles, office spaces, and special features. Too few photos (under 10) leave prospects with unanswered questions; too many (over 50) can overwhelm and dilute the impact of your best images.
Can I take good industrial property photos with a smartphone?
Yes, late-model smartphones with wide-angle lenses can produce quality listing photos. The key is technique: shoot from waist height (about 4 feet), turn on all lights, use HDR mode for mixed lighting, and keep the phone level to avoid distortion. Add a clip-on wide-angle lens ($15-30) and a tripod mount ($10-20) for better results. Proper preparation and editing matter more than expensive equipment.
How much does professional industrial property photography cost?
Professional industrial photography typically costs $300-1,000 depending on property size, location, and services included. Basic photography packages start around $300-500, while comprehensive packages with drone footage, virtual tours, and video walkthroughs can run $750-1,500. Given that quality photos can reduce vacancy time by weeks, the ROI often exceeds 500-900%.
What’s the best time of day to photograph industrial properties?
Schedule exterior shots for when the sun illuminates your main façade—typically morning for east-facing buildings and afternoon for west-facing. Avoid midday when harsh overhead sun creates dark shadows under overhangs. For interior shots, time of day matters less since you’ll rely on interior lighting, though daytime allows natural light through windows and skylights to supplement.
How do I photograph clear height effectively?
Clear height is hard to convey in photos without reference points. Include vertical elements that give scale: a person standing in frame, a forklift, stacked pallets, or racking. Shoot from a low angle looking up to emphasize height. Frame shots down aisles between columns to show both clear height and column spacing. Consider adding text overlays with actual measurements during editing.
Conclusion: Visual Storytelling Sells Industrial Space
Quality photography tells a compelling story about your industrial property—showcasing its functionality, condition, and potential. Investing time and resources in creating professional-quality listing photos dramatically increases your property’s visibility and appeal to qualified prospects.
Remember that in today’s digital-first search environment, your photos are often the first (and sometimes only) chance to make an impression. Make those impressions count with images that represent your property’s true value.
Ready to List Your Industrial Property?
Upload your photos and connect with qualified tenants searching for industrial space.
List Your Property